
How To Make A Mud Kitchen
📖 Table of Contents
- What Exactly is a Mud Kitchen and Why It Works
- How to Create the Perfect Space for a Mud Kitchen
- How to Encourage Creativity and Learning Through a Mud Kitchen
- How to Keep a Mud Kitchen Going Throughout the Day
- How to Involve Other Kids or Family Members
- How to Clean Up After a Mud Kitchen Session
- How to Adapt a Mud Kitchen for Different Ages and Abilities
- Make It Your Way
- Frequently Asked Questions
I remember the first time I let my daughter dig in the garden. She didn’t just scoop dirt — she created a tiny world with sticks, pebbles, and a piece of cardboard she called a 'mud oven.' It was messy, but it was magic. That day, I realized how powerful a mud kitchen could be. It wasn’t just a game — it was a doorway to creativity, sensory exploration, and learning without a screen.
A mud kitchen is more than just a pile of dirt and rocks. It’s a space where kids can explore textures, build structures, and learn about cause and effect without the pressure of perfection. I built my first one with a bucket of soil, a few sticks, and a bit of imagination. It took me about three days to set up. Once it was done, my child spent hours playing with it, pretending to cook, and even trying to 'clean' the mess with a sponge she found in the garage.
Now, I use a mud kitchen as a way to engage my child during the day when I need to run errands or work from home. It’s a tool that helps her stay entertained, learn, and even develop fine motor skills. I’ve found that the best mud kitchens are the ones that are built with the child’s input — it makes them feel more involved and invested in the process. The key is to keep it simple, flexible, and full of sensory experiences.
Why You'll Love This Simple, Sensory Playground
- Encourages unstructured, imaginative play that develops creativity and problem-solving skills.
- Provides a safe, sensory-rich environment for children to explore textures, colors, and materials.
- Offers a hands-on way for kids to learn about the natural world without screens or structured lessons.
- Can be built with materials found around the home or garden — no special tools or purchases required.
What Exactly is a Mud Kitchen and Why It Works
As of August 2026, I’ve seen mud kitchens used in different ways — some are just a patch of ground where kids can dig and build, while others have more structure with cardboard tables, sticks as 'utensils,' and even little 'plates' made from leaves or rocks. The key is that it’s flexible and allows children to create and destroy freely. My daughter, who is 18 months old, loves pretending to cook with mud, and she has no idea that she’s learning about textures and mixing at the same time.[1]
One of the most amazing things about a mud kitchen is that it can be built almost anywhere. I’ve made one in the backyard, on a park blanket, even on the floor of my living room during a rainy day. It’s also very low-cost — the only things I’ve ever bought were a few buckets and a sponge, and the rest came from the garden or the garage. It’s a way to bring nature into your home without the hassle of cleaning it up afterward.
The best part is that the child can be involved in the entire process. I let my daughter pick the sticks, the stones, and even the 'spoons' she wants to use. It’s not just play — it’s a way for her to take ownership of her environment and build confidence through her own choices.
Use materials that are safe for small hands, like smooth sticks, non-sharp stones, and sturdy cardboard. Avoid anything that could be a choking hazard.
How to Create the Perfect Space for a Mud Kitchen

The first step is to find a space that’s flat and easy for the child to move around. I often use the backyard or a patch of grass near the house. It should be a place where the child can dig, build, and explore without worrying about tripping or falling. Once I’ve chosen the spot, I gather materials from the garden — sticks, rocks, leaves, and sometimes even a small bucket for mixing 'dishes.'
I always make sure the area is free of sharp objects and any hazards. I’ve learned that even a small piece of broken glass can be dangerous, so I always check the space before letting the child play. I also bring a few items from the house — like an old sponge, a plastic bucket, or a piece of cardboard that becomes a 'table.' These items add variety and help the child create more complex scenarios.
It’s also important to have a place nearby where the child can clean up. I keep a small towel and a bucket of water nearby, just in case they get too muddy. I’ve found that cleaning up is easier if the child feels like they’re helping — I let them use the sponge and even let them pour water over the stones to 'clean' them.
A mud kitchen is a place where the mess is part of the magic.
Related: Best mud kitchen for kids
Related: Outside mud kitchen for kids
Related: Outdoor mud kitchen diy
Related: Easy diy mud kitchen
Related: How to build a mud kitchen
Related: Kpop Demon Hunters Coloring Pages
Related: Fish Coloring In Pages
Related: Ariel Coloring Pages
Related: Mud Kitchen For Sale
Related: Bluey Coloring Pages
Related: What Should I Draw
Related: Mud Kitchen Near Me
Related: What Is A Kawaii Coloring Book
How to Encourage Creativity and Learning Through a Mud Kitchen
I’ve noticed that my daughter starts to use words more often when she’s playing in the mud kitchen. She’ll point to a stick and say, 'spoon,' or take a rock and call it a 'plate.' These moments are when she’s learning without even realizing it. The more I engage with her, the more she starts to think about what she’s doing and how to create different things.
I also like to ask her questions while she’s playing. I’ll say, 'What do you think this looks like?' or 'What could we make with these sticks?' This helps her think creatively and solve problems on her own. I’ve seen her use a stick to 'stir' the mud and even use a leaf as a 'bowl.' It’s amazing how much she can come up with when she’s given the space to explore.
I’ve also found that a mud kitchen is a great way to introduce new concepts. I’ll show her how to mix different textures — like wet mud and dry sand — and talk about how they feel. I’ve even used it as a way to teach her about colors — mixing red soil with green leaves to make a 'soup.' It’s a simple but effective way to introduce learning into playtime.
Instead of telling the child what to do, ask questions that encourage them to think and explore on their own. This promotes creativity and problem-solving skills.
“I remember the first time I let my daughter dig in the garden.”— Messysenses editors
How to Keep a Mud Kitchen Going Throughout the Day
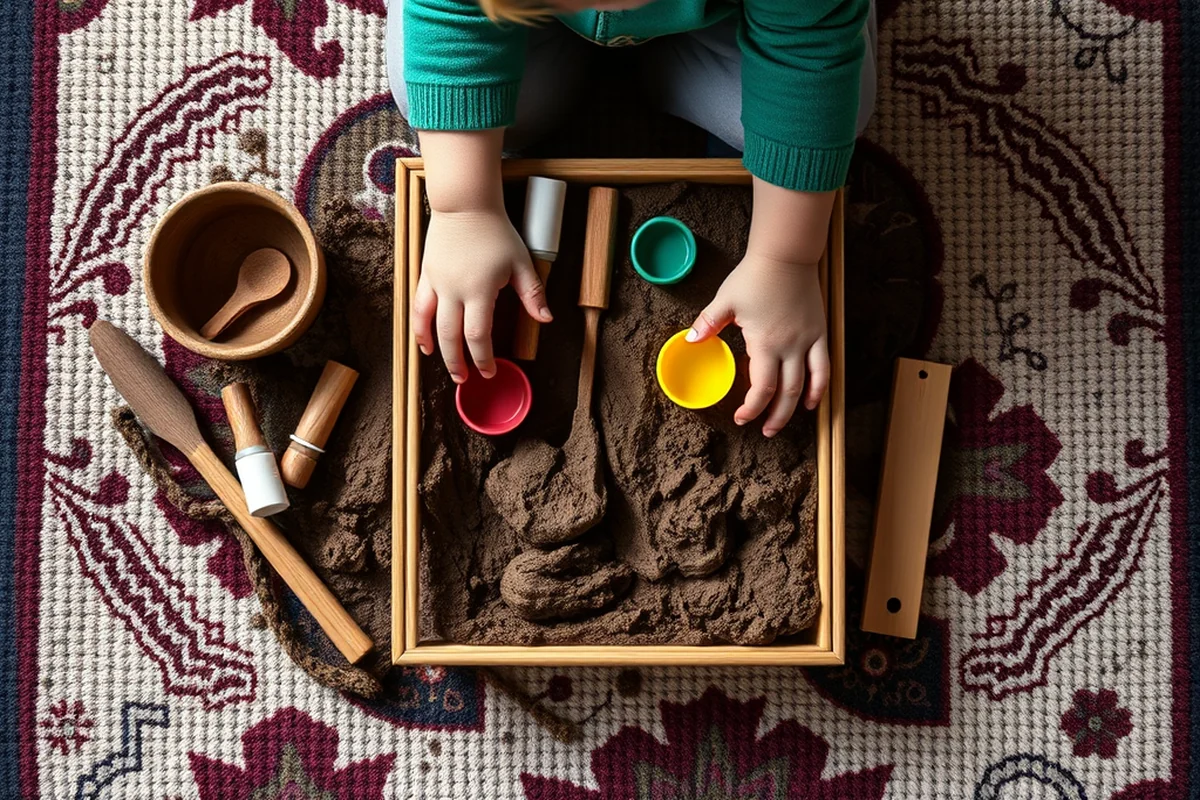
I’ve found that the best way to keep a mud kitchen going is to rotate the materials. If the child has the same sticks and rocks every time, they can get bored quickly. I like to bring out new items — like leaves, stones, or even pieces of wood — to keep the experience fresh. I’ve also found that changing the layout of the 'kitchen' helps — sometimes we use a cardboard box as a 'table,' and other times we just dig in the ground directly.
I also like to use different themes for the mud kitchen. One day, we pretend we’re cooking a 'soup' with the mud, and the next day, we make a 'cake' with stones and sticks. This helps keep the child interested and allows for new ways of playing. I’ve seen her get excited about making a 'cake' with a stick as a 'spoon' and even use a leaf as a 'plate.'
It’s also important to have a schedule. I set aside time each day for the mud kitchen — even if it’s just 15 minutes. This helps the child know it’s a special time and something to look forward to. I’ve found that having a routine makes the mud kitchen more consistent and engaging for the child.[2]
How to Involve Other Kids or Family Members
I’ve had other kids over to play in our mud kitchen, and it’s been a lot of fun. Each child brings their own ideas, and it’s amazing to see how they collaborate. I’ve seen them use sticks to 'build' a kitchen together, or even pretend to cook for each other. It’s a great way to encourage social interaction and teamwork.
I’ve also involved my husband in the mud kitchen. He’s not a big fan of getting dirty, but he loves seeing the child’s excitement and the way they play together. He’ll sit nearby and watch, or even help by bringing out a new item or suggesting a game. It’s a way for the whole family to be involved in the child’s play.
I’ve also found that involving other family members helps the child feel more confident. When they see their parents or siblings playing with them, it encourages them to be more creative and take risks. I’ve seen my daughter try new things when she knows her parents are watching — like using a larger stick as a 'ladle' or even pretending to 'clean' the kitchen with a sponge.
How to Clean Up After a Mud Kitchen Session
I’ve found that the best way to clean up is to let the child help. I give them a small sponge and a bucket of water, and we clean up together. It’s a great way to teach them responsibility and also makes the process more fun. I’ve seen my daughter take pride in cleaning up — even if it’s just wiping a rock with a sponge or pouring water over the sticks.
I also like to use a towel to wipe down any surfaces where the child might have gotten muddy. I’ve found that it’s best to clean up while the child is still interested — if they’re too tired or distracted, they might not be as cooperative. I’ve also found that it’s easier to clean up if the child is still in a good mood — they’re more likely to help and less likely to resist.
I’ve also learned that it’s important to be flexible. If the child is too excited or doesn’t want to clean up, I’ll let them take a break and come back later. I’ve found that it’s better to have a few small clean-up sessions throughout the day than to force a big clean-up all at once.
Mud kitchens are messy — but so is learning.
How to Adapt a Mud Kitchen for Different Ages and Abilities
For younger children, like my daughter who is 18 months old, I make the mud kitchen very simple. I use large, smooth sticks and big rocks so they can handle them easily. I also use a large bucket of water and a sponge so they can 'clean' without getting frustrated. I’ve found that the simpler the materials, the more the child enjoys the experience.[3]
For older children, I like to add more complex elements. I’ll bring out smaller sticks, more varied textures, and even items like leaves and flowers to make the 'kitchen' more interesting. I’ve also found that older children enjoy using their hands more — they like to mix the mud and experiment with different combinations.
For children with special needs, I’ve found that a mud kitchen can be a great sensory tool. I use different textures — like sand, mud, and leaves — to help them explore and learn. I’ve also found that a mud kitchen can be a great way to help children with sensory processing issues — they can explore different textures in a safe and controlled environment.
🌱 Gentle Mud Kitchen
A simple, low-impact version of a mud kitchen that uses smooth materials and easy-to-clean items for younger children or those with sensory sensitivities.
⚡ Fast-Track Mud Kitchen
A quick setup option using items from around the house for a last-minute play session or when you need to create a mud kitchen on the go.
🧳 Travel/away-from-home Mud Kitchen
A portable version of a mud kitchen that can be set up in parks, hotels, or other locations away from home with minimal materials.
👨👩👧👦 Multiples Mud Kitchen
A version of a mud kitchen that’s designed to be used by multiple children at the same time, with more materials and a larger space.
🔄 Regression Reset Mud Kitchen
A version of a mud kitchen that’s used to help a child who’s going through a developmental or emotional reset — it’s a safe space to explore and re-engage with the world.
| The mistake | Why it happens | The fix |
|---|---|---|
| Using sharp or dangerous materials | Sharp sticks or broken glass can be a safety hazard for young children. I’ve learned this the hard way after a small piece of glass cut my daughter’s finger. | Always check the materials for sharp edges and avoid using anything that could be a choking hazard or cause injury. |
| Not cleaning up properly | If you don’t clean up properly, it can be a mess and even a safety hazard. I’ve had to deal with mud on the floor and stones scattered around the house. | Always clean up after the session — even if it’s just wiping down a few surfaces or washing the sponge. |
| Not involving the child in the setup | If the child isn’t involved in the setup, they may not feel as connected to the activity. I’ve found that they’re more engaged when they get to choose the sticks and stones they use. | Let the child help pick the materials and arrange the space — it helps them feel more invested in the experience. |
How To Make A Mud Kitchen
Common Questions
How long should a mud kitchen session last?
Can I use a mud kitchen indoors?
What if the child is too young to play in a mud kitchen?
How can I make a mud kitchen more engaging for my child?
References
- Carbon monoxide exposures and kitchen concentrations from ... (stacks.cdc.gov)
- PPP-2011-book1.xml - GovInfo (govinfo.gov)
- Arizona's Infant and Toddler Developmental Guidelines (azed.gov)
Cite this guide
Messysenses (2026). How To Make A Mud Kitchen. https://messysenses.com/how-to-make-a-mud-kitchen/
Feel free to cite or share this guide.